
Palmiers are a very simple cookie to make, with just a sheet of frozen puff pastry rolled with granulated sugar. But without the right technique, you can go from perfectly caramelized to burnt on the bottom with very pale tops in just a few minutes. Thankfully, the technique is super simple—it only requires flipping the cookies during baking so both sides caramelize evenly!
These cookies are genuinely a great return on effort in baking: two ingredients, twenty minutes of hands-on time, and at the end, you have something that looks like it came out of a French bakery window. The recipe below is the version I’ve landed on after enough testing rounds to know what works well and what doesn’t. My top tips are: cold pastry going into the oven, an even sugar layer top and bottom, a hot pre-heated oven, and your full attention for the last few minutes of baking. Assembling the cookies is so easy, and they are fun to adapt to different flavors!
A reader, Beatrice, says: “Thank you for all of the palmier tips in your video and on your blog. My palmiers turned out really well, and I used the “paper towel” tip for shaping the puff pastry dough.” ★★★★★
Table of Contents
What Are Palmiers?
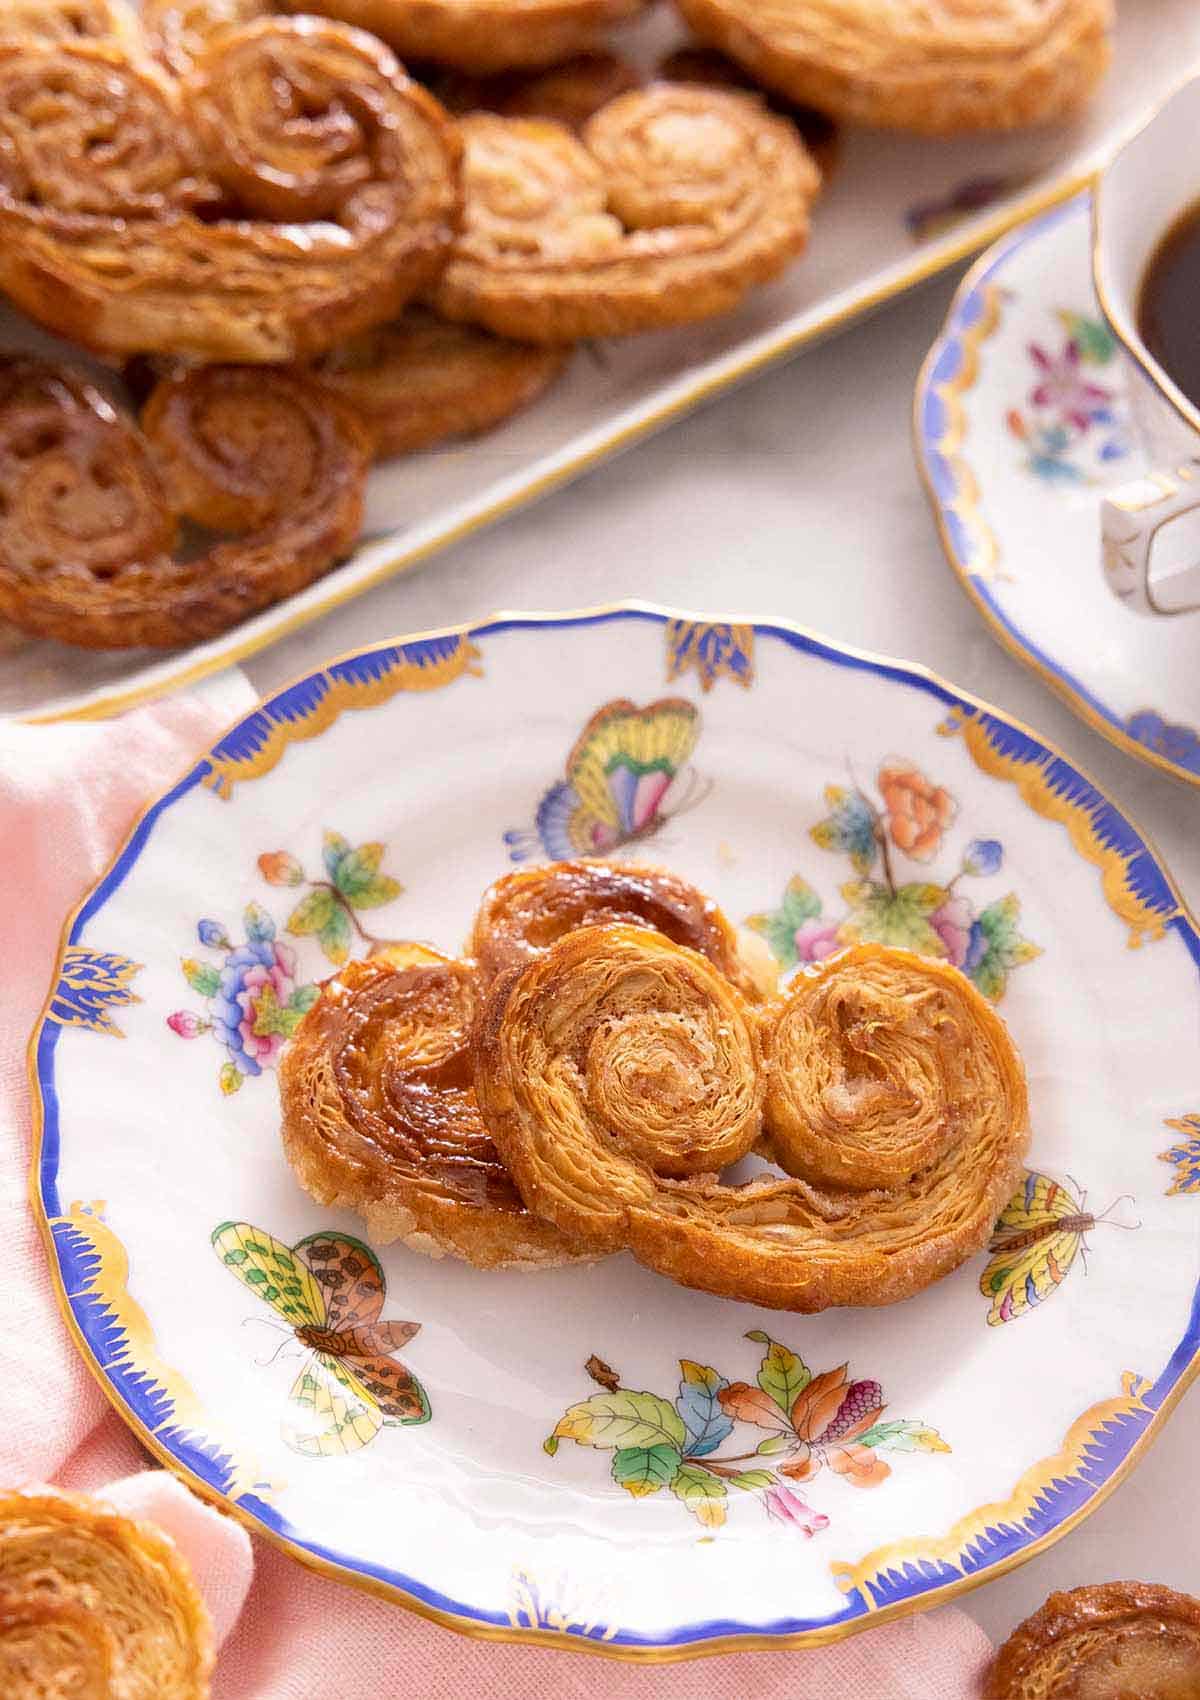
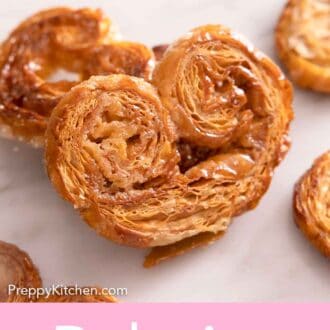
Palmiers (pronounced palm-ee-ay) are a classic French pastry. The name translates to “palm tree” as the cookies are shaped to resemble palm leaves, with two spirals rolled in from each side meeting in the middle. They go by other names depending on the region: elephant ears, French hearts, butterfly cookies, and even pig ears in some bakery cases.
Despite the different names, they are all, technically, made from a laminated puff pastry dough that is coated in sugar before being rolled and baked. Puff pastry is made with butter and dough folded over and over until you have hundreds of paper-thin layers. When you sprinkle sugar on it, fold it into a tight log, slice the log, and bake at high heat, you get three marvelous reactions: the water in the butter flashes to steam and pushes the layers apart (that’s the puff), the sugar caramelizes around every exposed surface (that’s the snap), and the layers crisp up into something halfway between a cookie and a pastry. The whole process takes 1 hour from start to baked cookies!
The Two Ingredients You Need
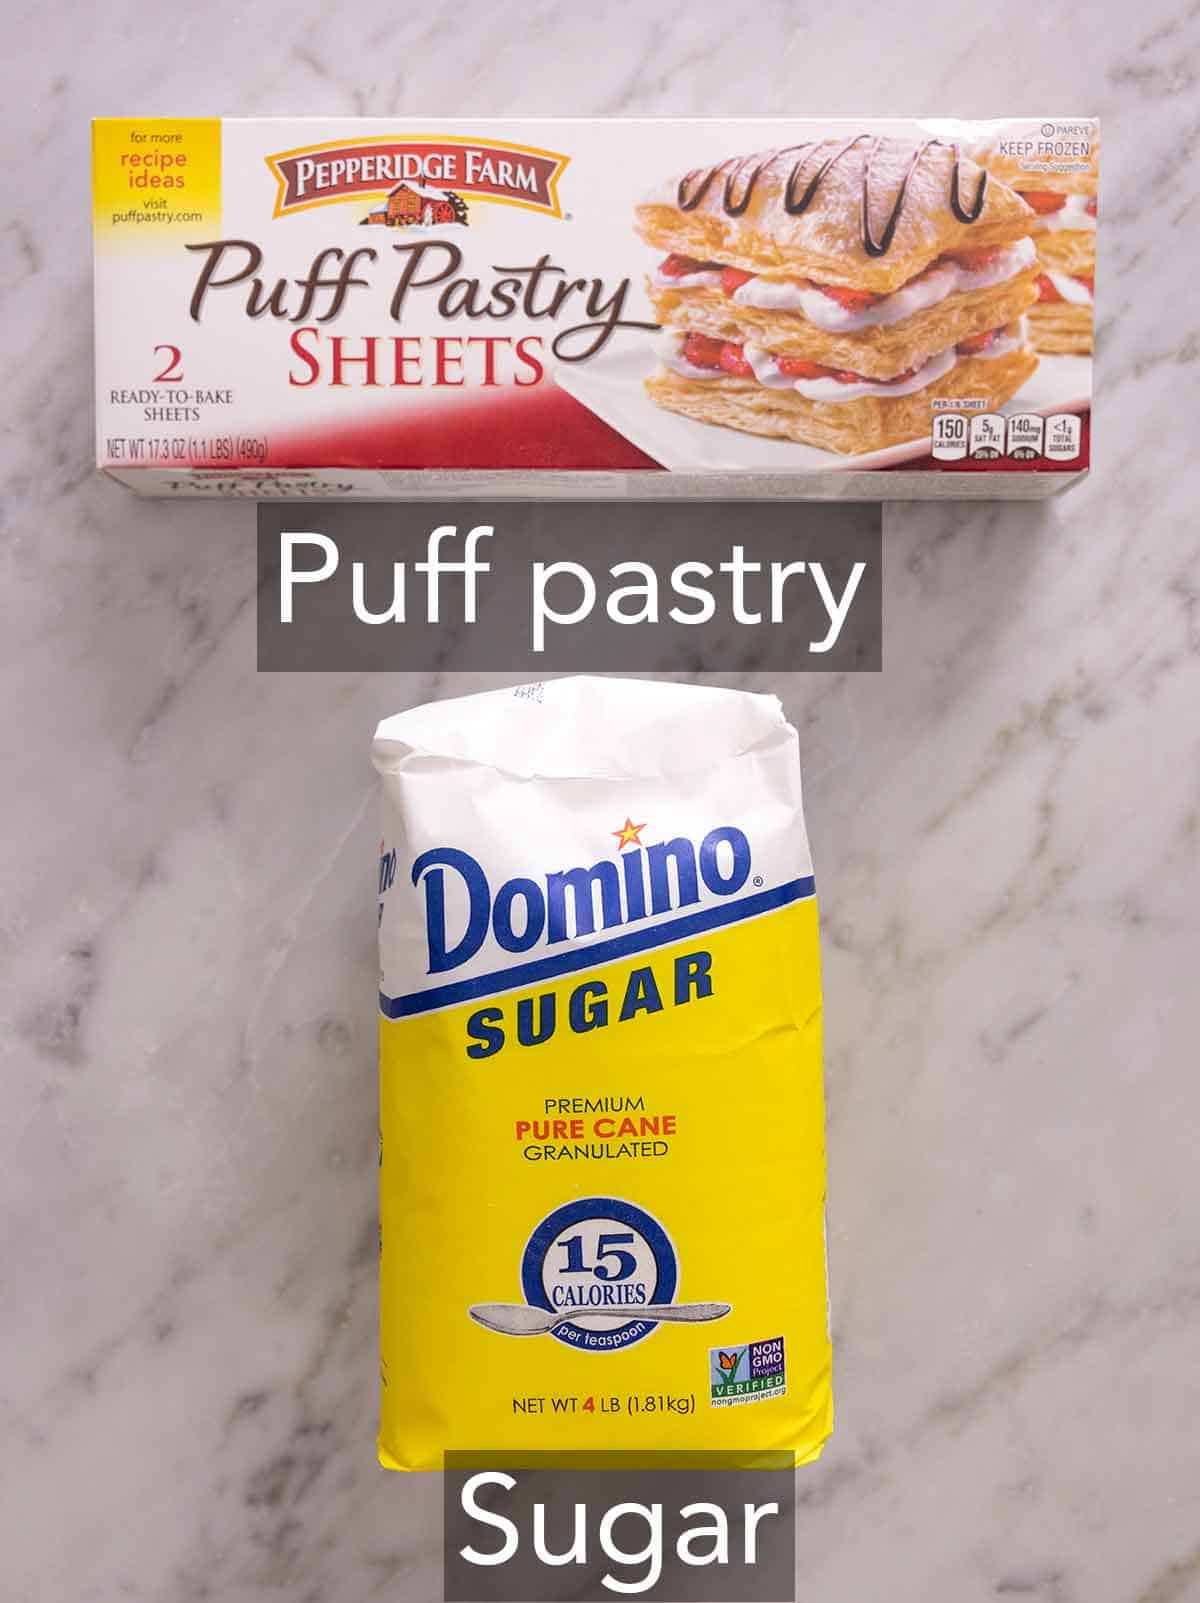
These are the main ingredients you need to make palmiers. You can find the full list of ingredients and measurements in the recipe card below.
Puff pastry — this is the main component of the cookies. You can use a sheet of frozen puff pastry for the easiest and most convenient version. Or, you can make a homemade rough puff pastry for the ultimate palmiers! In the section below, I break down the differences between using two brands of store-bought frozen puff pastry and homemade.
Sugar — plain granulated white sugar is the best option. It caramelizes to a clear amber finish and gives a clean snap. Demerara or turbinado gives you bigger crystals, a more visible texture, and a slight molasses note, but they can burn more easily with the added molasses (same with brown sugar). Don’t use powdered sugar—it dissolves into the pastry instead of caramelizing on the surface.
Different Brands Of Puff Pastry vs Homemade
There are two main brands of puff pastry you can buy frozen—Pepperidge Farm and Dufour. I tested each of these along with my own puff pastry recipe to compare the differences. Here’s how your palmiers will turn out with each one and when or why to use one type over the other:
Pepperidge Farm puff pastry — the standard supermarket option in the US, made with vegetable shortening rather than butter. It works well and has the added benefit of being dairy-free. The cookies are crisp, and the layers separate properly. The flavor is good but not luxurious. If you have eaten scratch-made palmiers from a bakery, Pepperidge Farm will taste like a step down. If you’re new to palmiers, you’ll think they’re delicious!
Dufour puff pastry — premium, all-butter frozen puff pastry. It is sold in some Whole Foods and specialty grocery stores. The flavor difference is immediate, and the layers separate higher and crisper. This brand is worth seeking out if you want palmiers that taste like the bakery version. An important note: all-butter puff caramelizes faster, so cut your initial bake time by 1 to 2 minutes and watch the bottoms closely from minute six on.
Homemade puff pastry — if you have the time, my puff pastry recipe walks through the lamination process to make a quicker rough puff pastry. Homemade pastry gives the highest, flakiest layers and the best flavor, but it does require time. Remember to drop the bake time for this version as well, since it’s an all-butter pastry.
For palmiers specifically, the marginal gain of flavor and texture of homemade over Dufour is smaller than Dufour or homemade over Pepperidge Farm. I will use the higher-quality brand or homemade pastry when I’m doing a gift tin or special parties. For a quick and easy treat, I use Pepperidge Farm and don’t apologize for it!
Shaping Palmiers
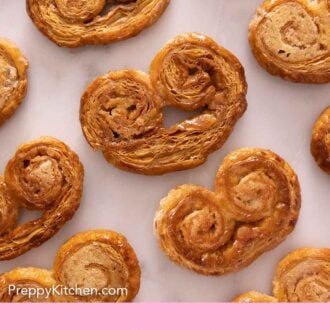
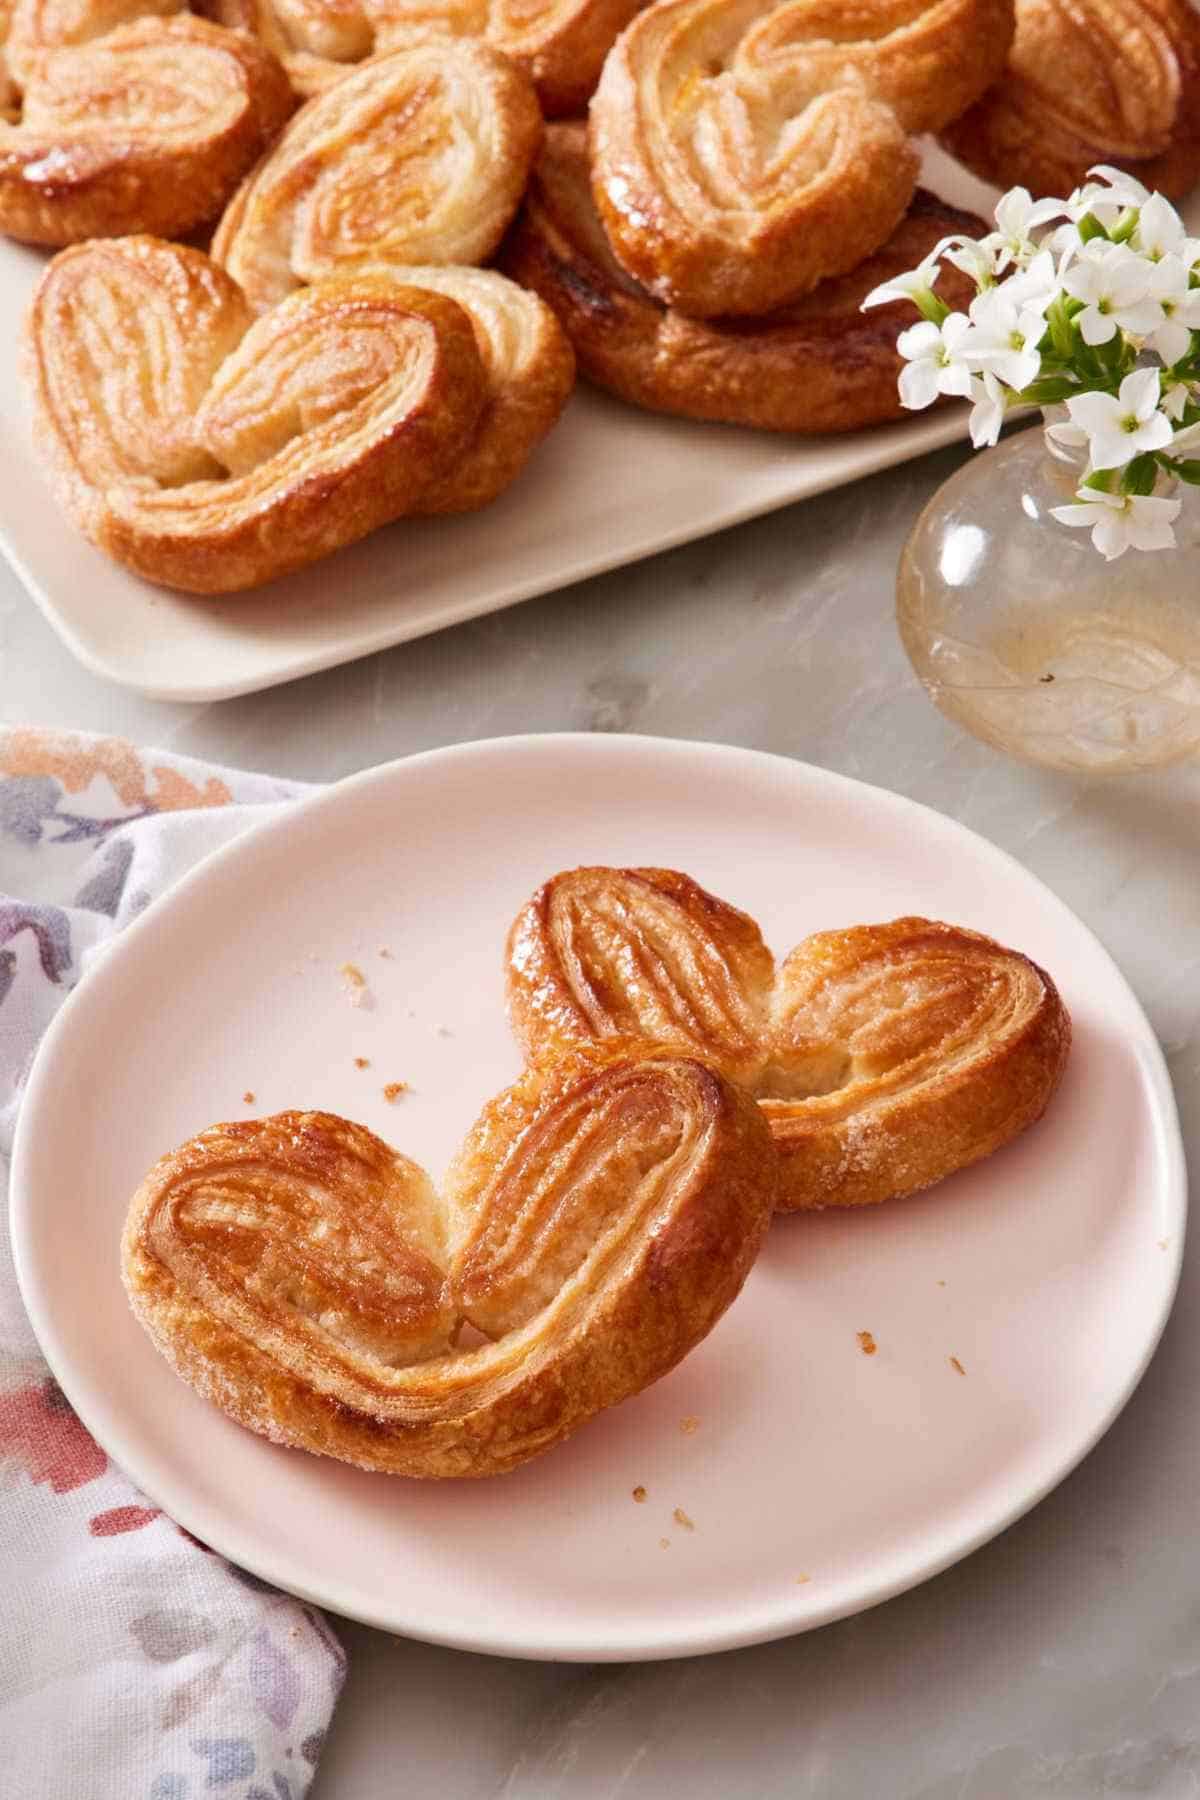
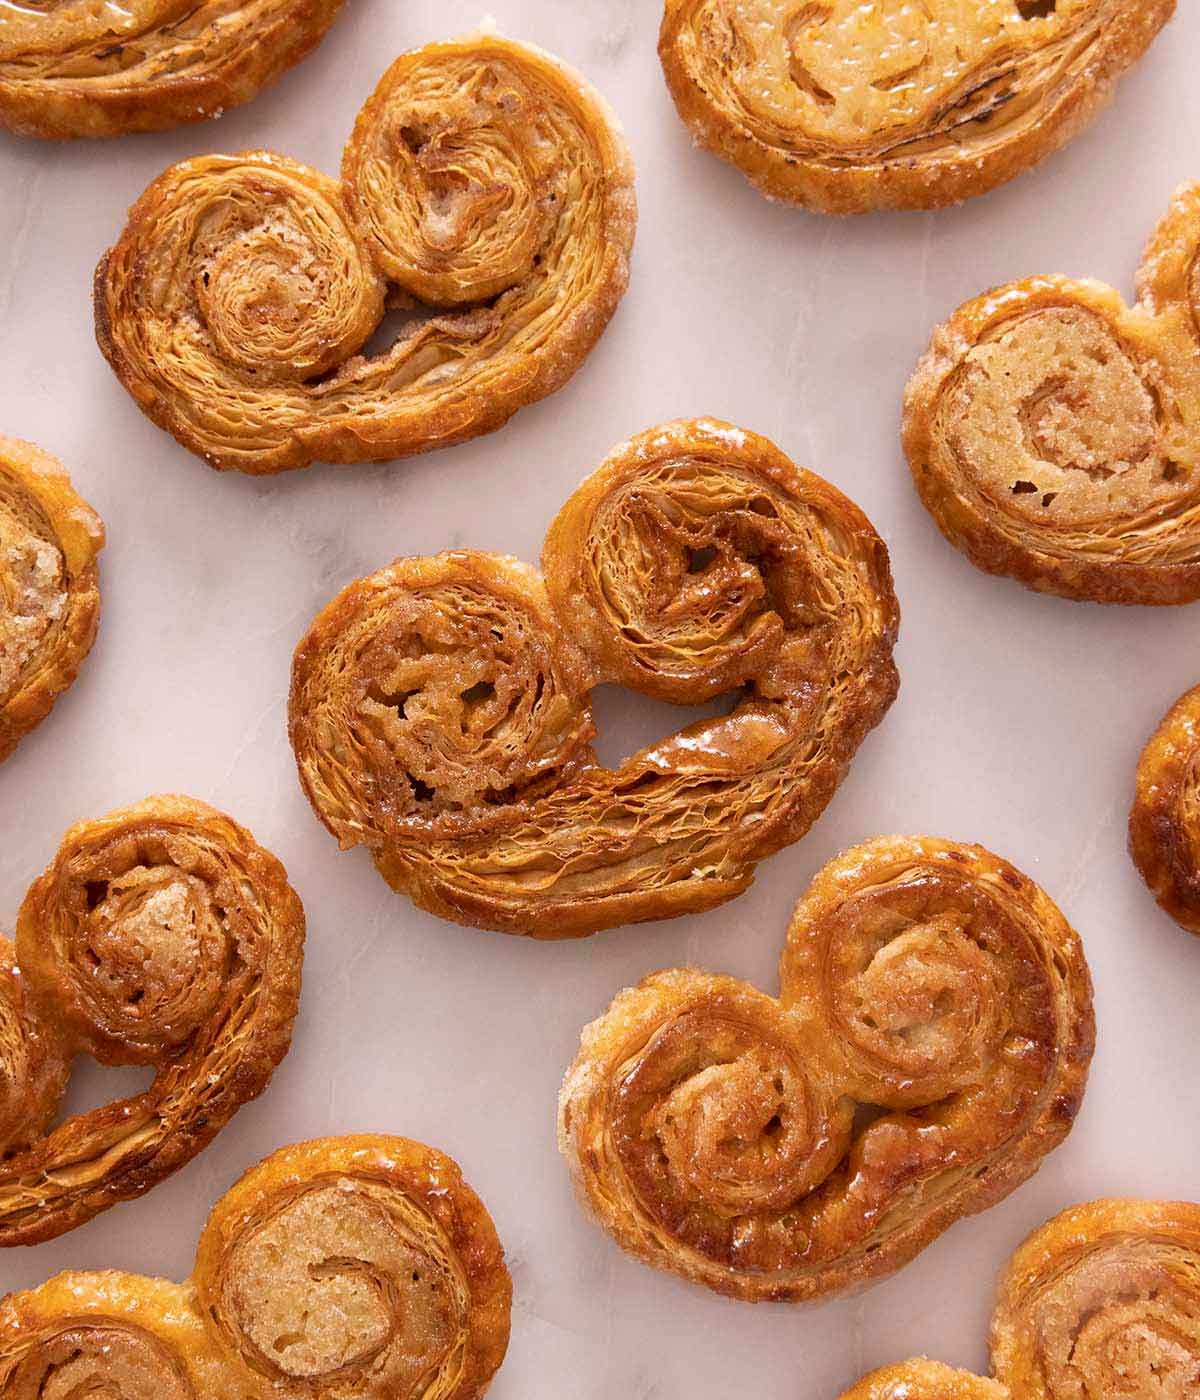
There are two traditional shapes you see in French bakeries: the folded “heart” version and the rolled “palm” version.
- The folded version is where each long side of the dough is folded letter-style, which gives a “V” or heart shape and a slightly more open cookie. (You can see this version baked in the image above.)
- The rolled version takes both long edges of the pastry and rolls them tightly to meet in the center. I prefer the rolled version because the tight spiral caramelizes more evenly, and the slices are less likely to fold open when the pastry puffs in the oven.
How To Make Palmiers
Below, I’ve highlighted portions of the recipe in step-by-step process images along with instructions for making palmiers. You can find the full set of instructions in the recipe card below.
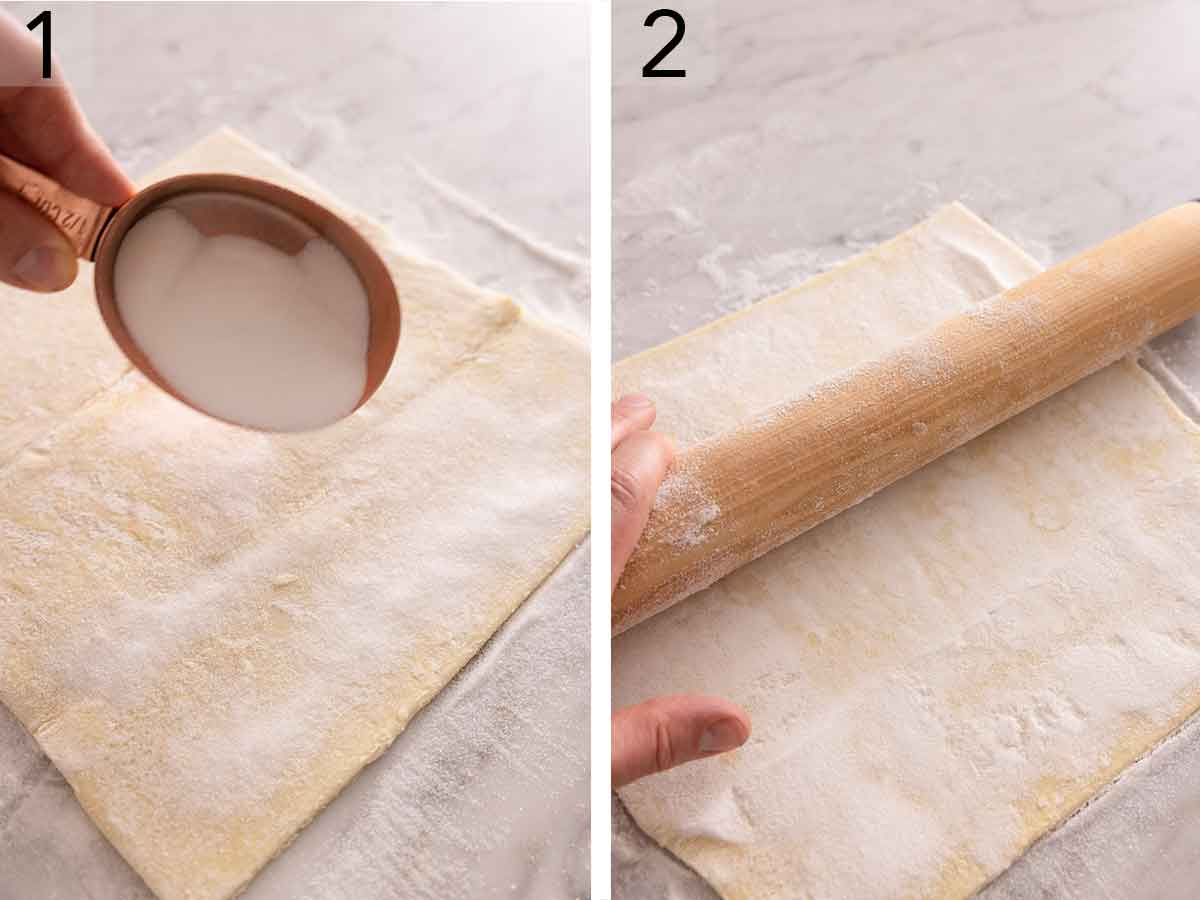
1. Sugar the counter, then sugar the pastry. The trick that makes this recipe work is sugaring both sides of the pastry at once. Sprinkle half of the sugar into a roughly 9-inch square on a clean counter, lay the thawed pastry sheet on top, and spread the remaining sugar over the top.
2. Roll to a 12-inch square. Just use a few firm passes with a rolling pin to expand it slightly. Don’t roll it too thin or the layers will fuse together instead of separating in the oven. When you roll, the rolling pin presses sugar into both surfaces simultaneously. The sugar will press into the dough and look almost embedded (that’s correct!).
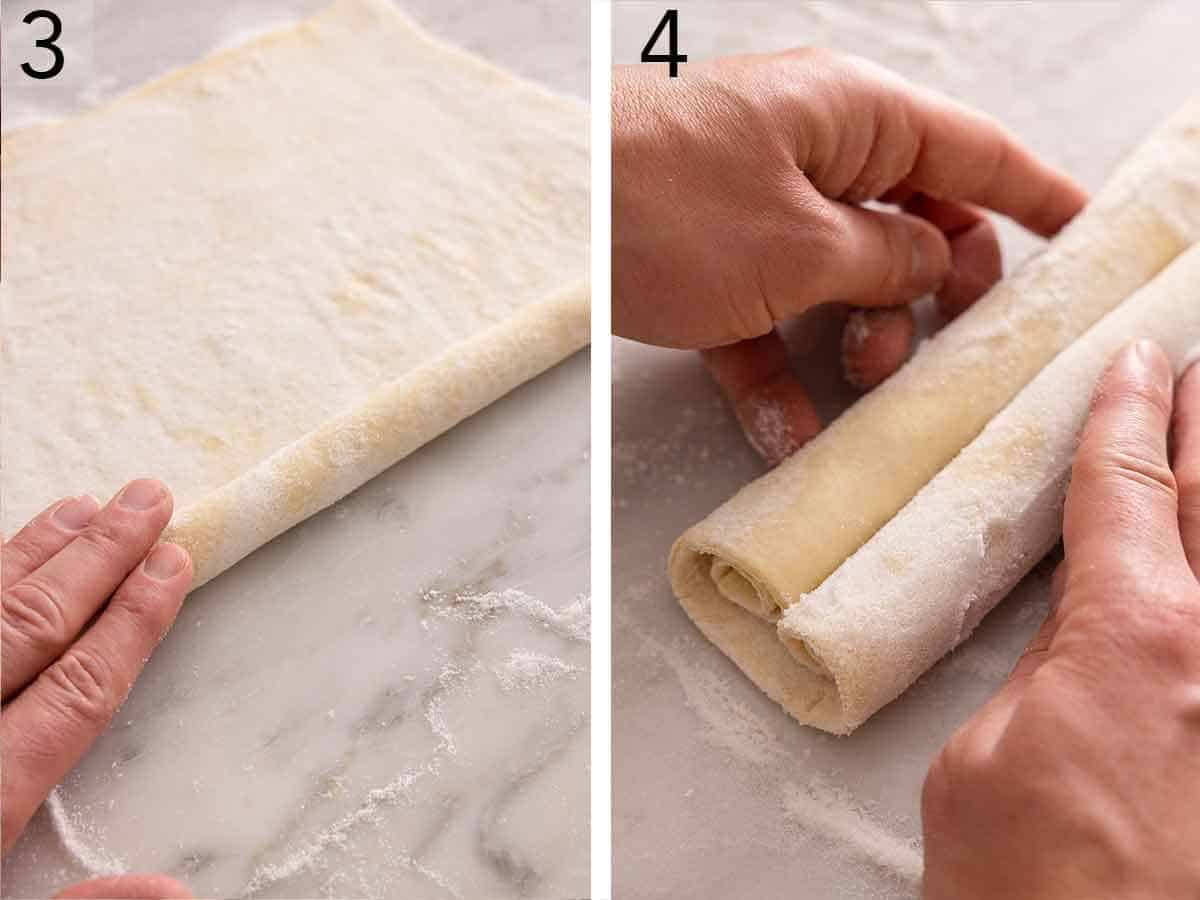
3. Roll up both edges to the center. Take one edge and roll it toward the middle in a tight spiral, stopping at the center of the dough sheet. Do the same from the opposite edge. The two rolls should meet at the center and look like two scrolls side by side. Tightness matters here—loose rolls can unravel in the oven and lose their shape.
4. Freeze the log. Wrap the rolled log in plastic wrap, then place it in the freezer for at least half an hour. The freezer firms up the butter so the slicing is clean, and the butter in the cookies doesn’t soften before they hit the oven. Thirty minutes in the freezer is the minimum, and it’s the difference between cookies that hold their shape and cookies that smash when you cut them, or don’t puff well in the oven. If you have the time, an hour or more in the freezer is even better—you can make the log a day ahead and freeze it in a paper towel tube (or a baguette pan) to keep it perfectly round.
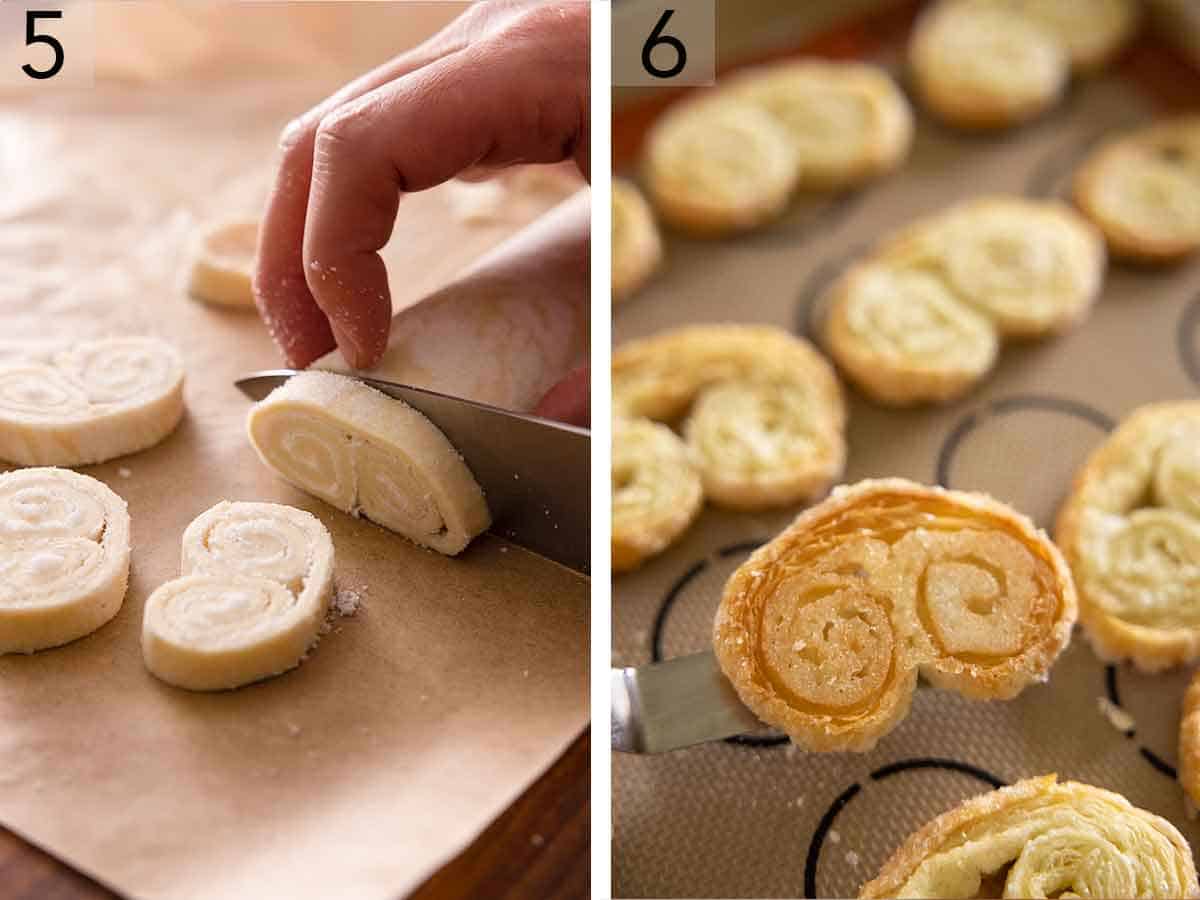
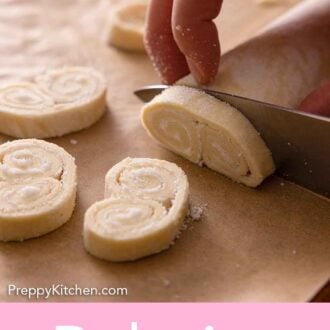
5. Slice a ¼ inch thick. To cut out the individual cookies, use a sharp knife and a sawing motion to slice the frozen log. Don’t press straight down, or you’ll squash the spiral. You’ll get about 22 cookies from a single sheet. Lay them on parchment-lined sheets with at least an inch between each one. (They will puff and spread during baking.)
6. Bake at 425°F. They need about eight minutes on the first side, or until the sugar bubbles up with a light caramel color on the bottoms (lift one with a spatula to check). Then, flip every cookie. Bake for several more minutes on the second side, until both sides are deeply golden brown. The flip is non-negotiable for even color and caramelization. I tested baking unflipped vs flipped on the same batch, and the flipped batch had the same caramelization top and bottom; the unflipped batch had dark bottoms and pale tops. It might feel annoying or unnecessary, but it’s important, so don’t skip it!
Four Things That Go Wrong (And How To Fix Them)
Here are the four main issues readers run into when making palmiers and how to troubleshoot them:
The cookies don’t puff and stay flat. There are three main reasons. 1) Your oven isn’t hot enough. The puff pastry needs to bake at 425°F to generate the steam that lifts the layers. Use an oven thermometer to check your oven’s true temperature. Most home ovens run 15-25°F off their dial. 2) If you’re confident your oven is calibrated, and the cookies still won’t puff, your pastry was likely over-rolled and the layers fused before they had a chance to separate. Roll less aggressively next time. 3) If your cookies were soft and the butter felt greasy when they went into the oven, the pastry wasn’t cold enough. This means the butter didn’t steam, and instead just melted and leaked out of the pastry instead of puffing up. Make sure the dough is frozen before slicing and immediately baking.
The bottoms burn before the tops are golden. It’s possible your oven rack was positioned too low, so the bottom got too hot too fast. Position it in the center of your oven for the most even heating.
The cookies unravel and lose their shape. The roll wasn’t tight enough, or the dough wasn’t cold enough when you sliced it. Roll firmly, freeze hard (30 minutes minimum, and don’t skip it), and slice straight from the freezer, then bake immediately. If a cookie unravels when you place it on the sheet pan, gently roll it back together with your fingers before it bakes—it’ll set in shape once the butter melts.
The cookies are soggy after cooling. Two causes: either you didn’t cook them long enough on the second side, or you cooled them on the sheet pan instead of a wire rack. Move them to a rack as soon as they come out of the oven so steam can escape. If they’re already soggy, return them to a 350°F oven for 5 minutes to re-crisp.
Sweet & Savory Variations
My two-ingredient base recipe is a starting point for so many different flavors! Here are a few of my favorite variations worth trying:
Cinnamon-sugar palmiers. Whisk 1 teaspoon of ground cinnamon into the sugar before sprinkling. This is the most popular variation for palmiers, and I can see why. The cinnamon caramelizes alongside the sugar, and the result tastes like the inside of a cinnamon roll. A reader (Maria) mentions this as her favorite, and she’s right—they are so tasty!
Citrus zest palmiers. Rub 1 tablespoon of finely grated lemon, orange, or lime zest into the sugar with your fingers until it feels damp and is fragrant. The zest’s oils infuse the sugar, and when the cookies bake, the citrus aroma carries throughout the cookies. Lemon-sugar palmiers with a cup of strong tea is one of my favorite afternoon treats.
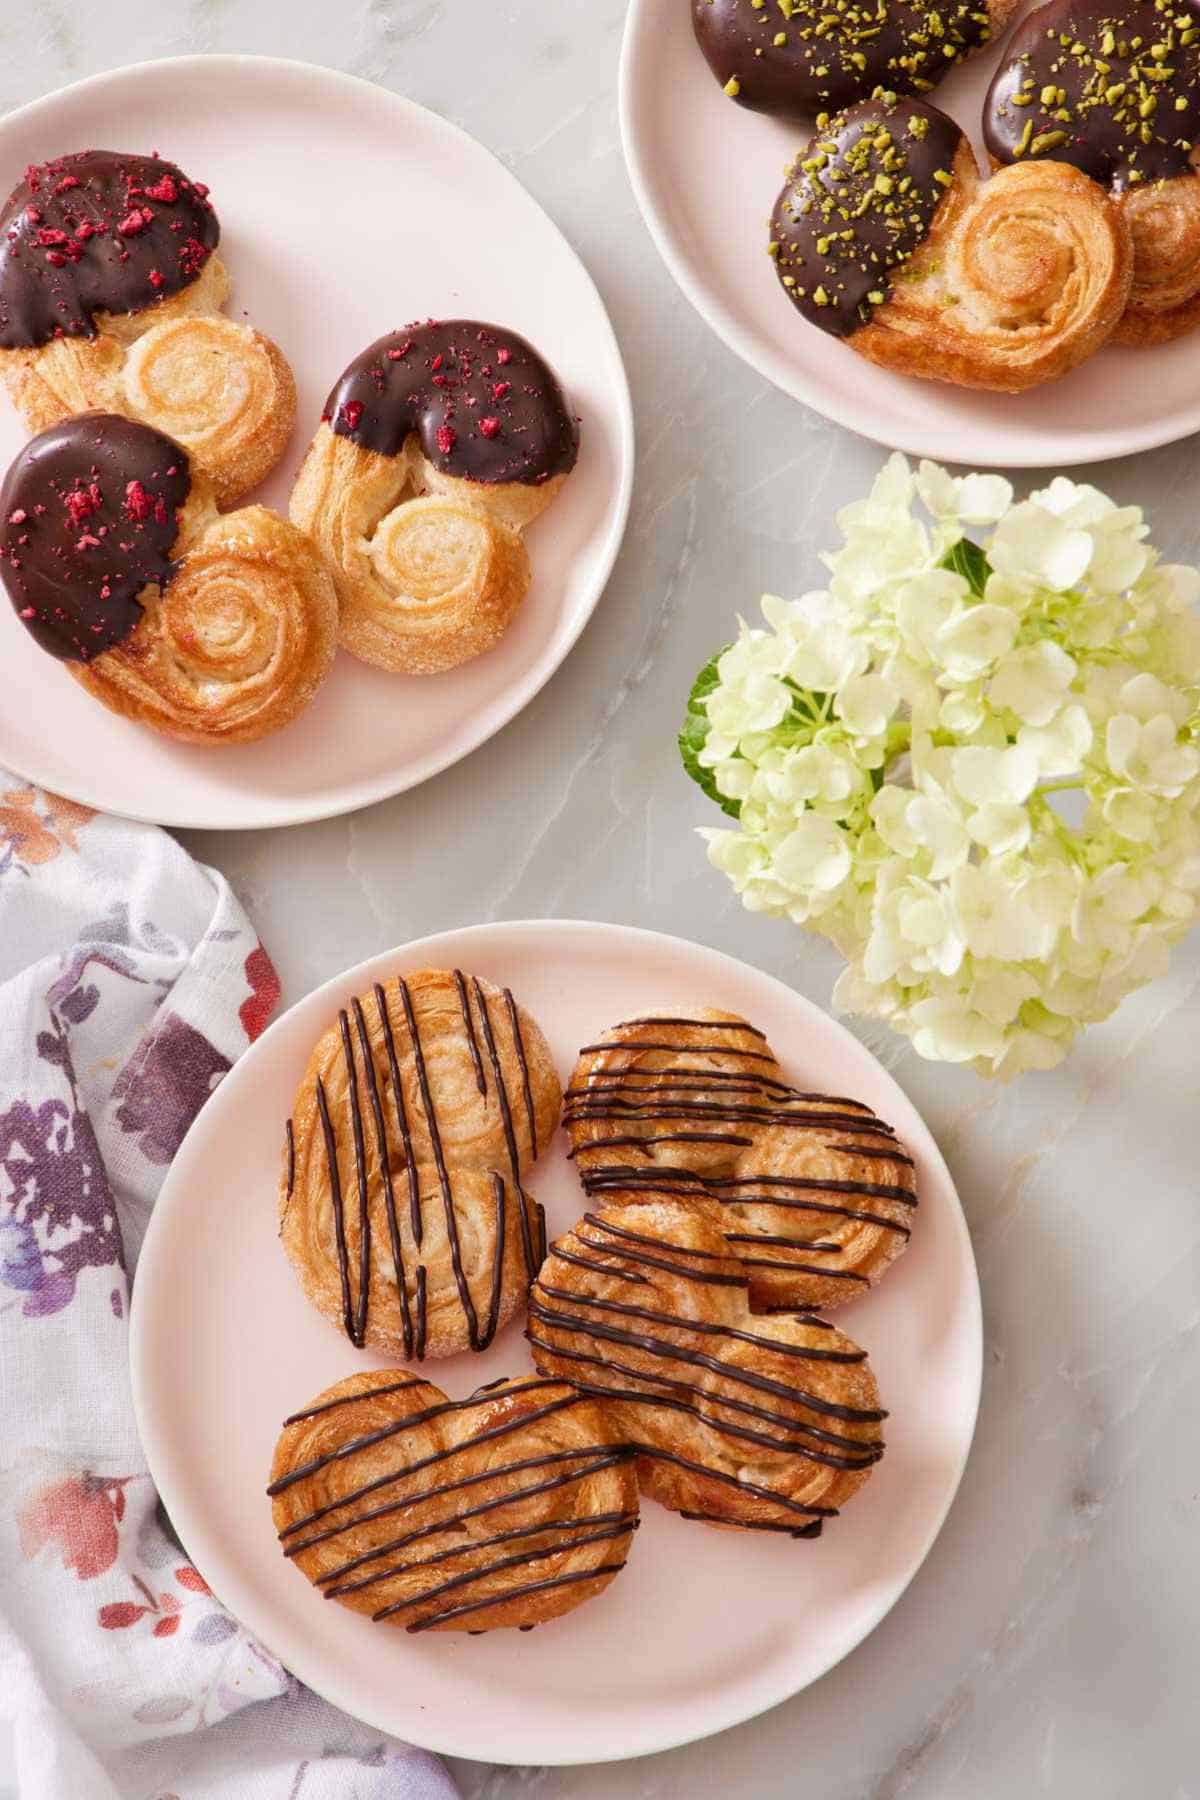
Chocolate-dipped palmiers. Once cooled, dip half of each baked cookie in 1 cup of melted dark chocolate and let it set on parchment. You can also put the chocolate in a pastry bag and drizzle it over the cookies. Leave them plain or sprinkle freeze-dried fruit, sprinkles, nuts, or toasted coconut onto the chocolate before it sets. This pushes them firmly into the “fancy dessert” territory, but they are still so easy!
Almond palmiers. Replace 2 tablespoons of the sugar with almond flour or finely chopped almonds. The almonds caramelize alongside the sugar, and the cookies taste like a buttery, crunchy almond praline. If you’ve made my French Macarons and have leftover blanched almond flour, this is the move.
Savory palmiers (the appetizer version). Skip the sugar entirely. Spread the top of the puff pastry thinly with pesto, olive tapenade, or 2 tablespoons of softened butter mixed with herbs, then top with ½ cup of finely grated parmesan or gruyère. Roll, freeze, slice, and bake the same way—but at 400°F and watch closely for flipping as your fillings may brown at different rates. The lower oven temperature means the pastry won’t be quite as puffed, but it prevents more delicate savory fillings from burning. Serve savory palmiers warm as a cocktail-hour appetizer.
Pro Tips For Making This Recipe
Make sure the dough stays cold as you work with it. To keep the dough cold, work quickly. If the puff pastry softens, return it to the fridge or freezer to firm back up. The butter melts when the puff pastry gets warm, and it won’t bake into airy layers if you put it in the oven too soon.
Use a paper towel tube for chilling. This helps your puff pastry log hold its shape during chilling! Cut lengthwise down the one side of an empty cardboard paper towel tube, fold it open, and place your wrapped log inside. This will put tension on the outside of the log to help it hold together while it firms up in the freezer.
Make sure there is enough space between the palmiers on the sheet pan, as they will expand as they bake. About an inch between each one is fine.
Use an oven thermometer if your oven is not precise. The high heat is required to create enough steam in the oven for the puff pastry to rise. If the heat is too low, you may end up with flat pastries. See my complete post on how to know your oven’s real temperature at Academy: Knowing Your Oven.

Palmiers Recipe
Video
Equipment
- Baking Sheet
Ingredients
- 1 sheet puff pastry (thawed overnight if using frozen)
- ½ cup granulated sugar (100g)
Instructions
- If using frozen puff pastry, make sure your sheet is fully thawed but still cold before you start. If using homemade, roll into a 9-inch square before proceeding.
- Sprinkle ¼ cup (50g) sugar on your counter in about a 9-inch square. Lay the puff pastry sheet on top. Sprinkle pastry with remaining ¼ cup (50g) of sugar.
- Roll pastry into a 12-inch square. Tightly roll up one edge to the center of the pastry. Tightly roll the opposite edge until they meet in the center.
- Freeze for 30 minutes. (If you’d like, you can place the log in a split paper towel roll or use another mold like a baguette pan to help the puff pastry hold its shape during freezing.)
- Preheat the oven to 425°F while the dough freezes. Line two large baking sheets with parchment paper or a silicone mat.
- Slice the frozen log crosswise into ¼-inch thick pieces. (You will have about 22 slices.) Place the slices on the baking sheets about 2 inches apart.
- Bake for 8 minutes or until sugar starts to caramelize on the bottom. Flip cookies over and bake for another 4 to 5 minutes or until golden brown. Transfer to a wire rack and cool completely. Store in an airtight container for up to 1 week.
Notes
- If baking the palmiers in batches (if they won’t all fit on one baking pan), switch out the parchment paper or wipe down the silicone mat in between. Sugar from the previous batch will burn onto your new batch. Keep the unsliced portion of the log in the freezer until the first batch has baked, cooled, and been transferred from the pan.
- If using an all-butter brand or homemade puff pastry (versus Pepperidge Farm), the cookies may caramelize faster in the oven. Cut the initial bake time by 1-2 minutes and watch the bottoms closely from minute 6.
- A parchment paper-lined baking sheet will caramelize faster than a silicone baking mat (like a Silpat). If using a Silpat, look for a nice bubbly caramel forming around the bottom of the palmiers to know when they’re ready to flip. It will likely be around 10 minutes, but it may take a minute or two longer depending on your oven. The bottom of the palmiers should look mostly glossy and have a light amber color when you flip them.
Nutrition
Frequently Asked Questions
Yes, in most usage. “Palmier” is the French name (literally “palm tree,” for the leaf-shaped silhouette); “elephant ears” is the most common American name. You’ll also see them sold as French hearts, butterfly cookies, palm leaves, or pig ears, depending on the bakery and where they are being made. They’re all the same cookie: puff pastry plus sugar, rolled into a double spiral and baked.
Yes, and this is actually a great way to make them. You can keep the whole log frozen in a freezer bag or tightly wrap it in plastic wrap and foil for up to 3 months. Or, slice the cookies, lay them on a lined sheet pan in a single layer, and freeze until solid (about 1 hour). Transfer them to a freezer bag and store for up to 3 months.
Slice, if needed, and then bake straight from frozen as directed in the recipe. I don’t recommend freezing baked palmiers. They lose their crisp once thawed, and the caramelized sugar turns sticky.
In an airtight container at room temperature for up to 1 week. They’re best in the first 2-3 days when the snap is at its peak. After that, they’re still good but less crispy. If they soften, you can reheat in a 350°F oven for 5 minutes and then let them cool to bring back the crunch.
Even caramelization. The sugar in each cookie that sits directly against the hot baking sheet caramelizes much faster than the sugar on top. If you don’t flip, you end up with mahogany bottoms and pale tops. Flipping around the 8-minute mark gives both sides the same deep golden color and creates the sugar snap on both surfaces.
More Recipes To Try
If you like puff pastry treats, try one of these baking recipes next:
- Cheese Danish — uses the same sheet pastry as the base but is cut and filled with cream cheese.
- French Macarons — the iconic French cookie perfect for gifting.
- Madeleines — a cake-like French cookie to round out an afternoon-tea spread.
- Croissants — build on the same lamination concept and make your own flaky breakfast pastries.
- Shortbread Cookies — another super easy, minimal-ingredient cookie worth keeping in your rotation.
If you’ve tried this palmier recipe, then don’t forget to rate it and let me know how you got on in the comments below. I love hearing from you!
Kathy Sankovic says
These are delicious pastry cookies (can’t decide which, but doesn’t matter). My oven is electric and definitely not state of the art. I under baked the first side of the first batch, definitely needed 10 minutes in my oven. Second batch came out great! I flipped the first batch back to first side and popped in the oven for a couple of minutes more and they browned up nicely and taste as good as the second batch. I’ve never tried these in bakeries before because they looked boring, but they are a wonderful as you described. Thank you for sharing this recipe!
Jen says
these are delicious! my oven runs hot so I knocked it down to 400. Turned out perfect
Trevor J says
Made these for French class; haven’t brought them in yet, but the one I had was really good!
Beatrice says
Thank you for all of the palmier tips in your video and on your blog. My palmiers turned out really well, and I used the “paper towel” tip for shaping the puff pastry dough.
Also, your collection of Herend china is lovely.
Ada says
John I’m making this for the second time today!! Love them!
Maria says
Add cinnamon to the granulated sugar for a really delicious palmier
May says
Omg! Literally last week I was searching through your blog for a palmiers recipe…and you posted one! What perfect timing. Thank you! 😀